Using The Control Program
A Few Points to Note
There are few points its best to have in mind when operating the software :-
The Loops
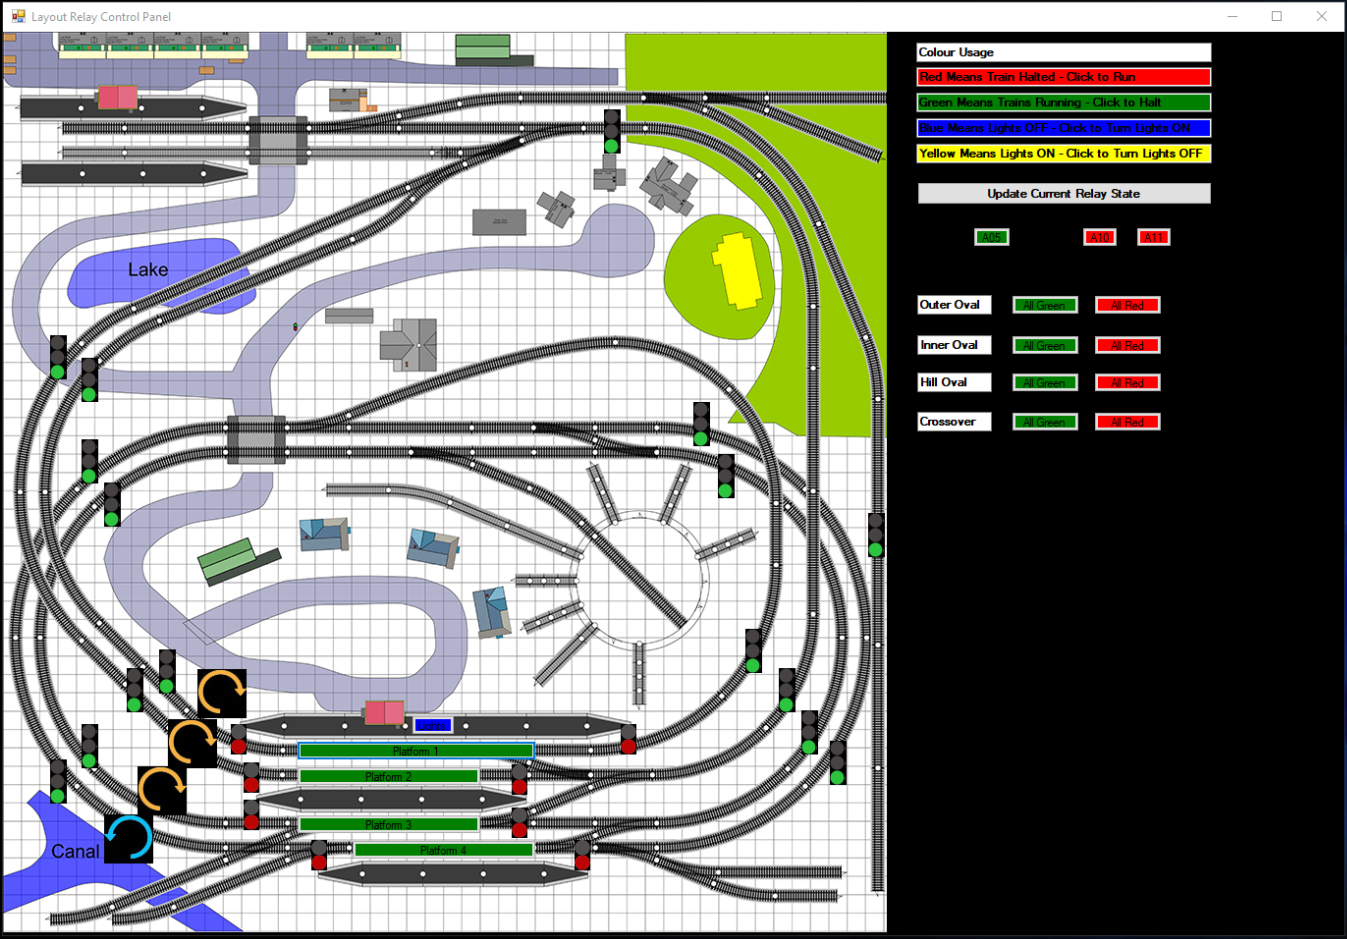
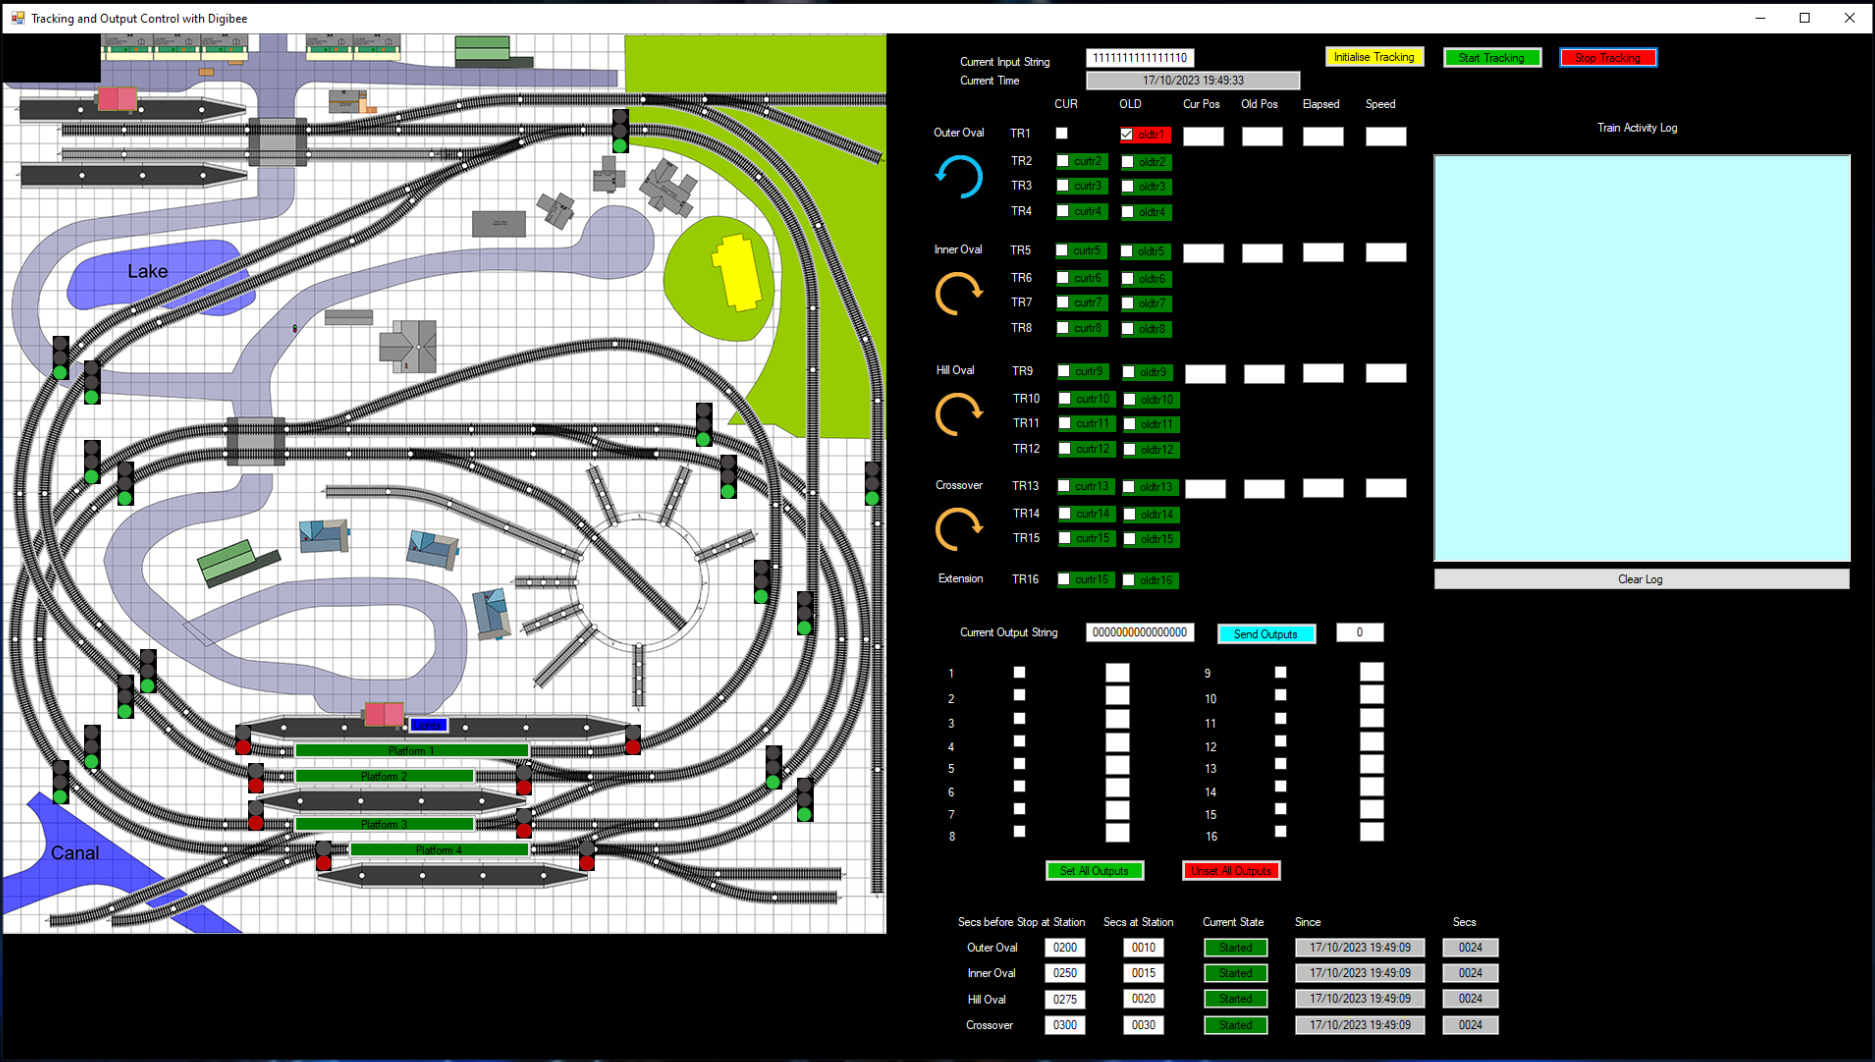
• Loop A – Outer Oval - Normally in anticlockwise mode
• Loop B – Inner Oval - Normally in Clockwise Mode
• Loop C – Hill Oval - Normally in Clockwise Mode
• Loop D – Crossover – Normally in Clockwise Mode
Main Station Platform Numbers
• Platform 1 – On the Crossover Route – Not in Common Use
• Platform 2 – On the Hill Oval – Normally in Clockwise Mode
• Platform 3 – On the Inner Oval – Normally in Clockwise Mode
• Platform 4 – On the Outer Oval – Normally in anticlockwise mode
The Platforms from the front as you view the layout number 4 – 3 – 2 - 1
Locomotive Numbers
• 11 – Centro Class 150 DMU – Normally running clockwise on the Inner Oval via Platform 3
• 12 – Centro Class 150 DMU – Normally running anticlockwise on the outer oval via Platform 4
• 10 – BR Sprinter DMU – Normally running clockwise on the rear hill oval via platform 2
• 01 - Bon Accord Steam Locomotive
• 02 – Class 47 Diesel
• 05 – Queens Own Class 55 with sound
• 06 – Class 08 Blue Wasp Shunter
• 21 – Smokey Joe Steam Loco Comm Port Numbers
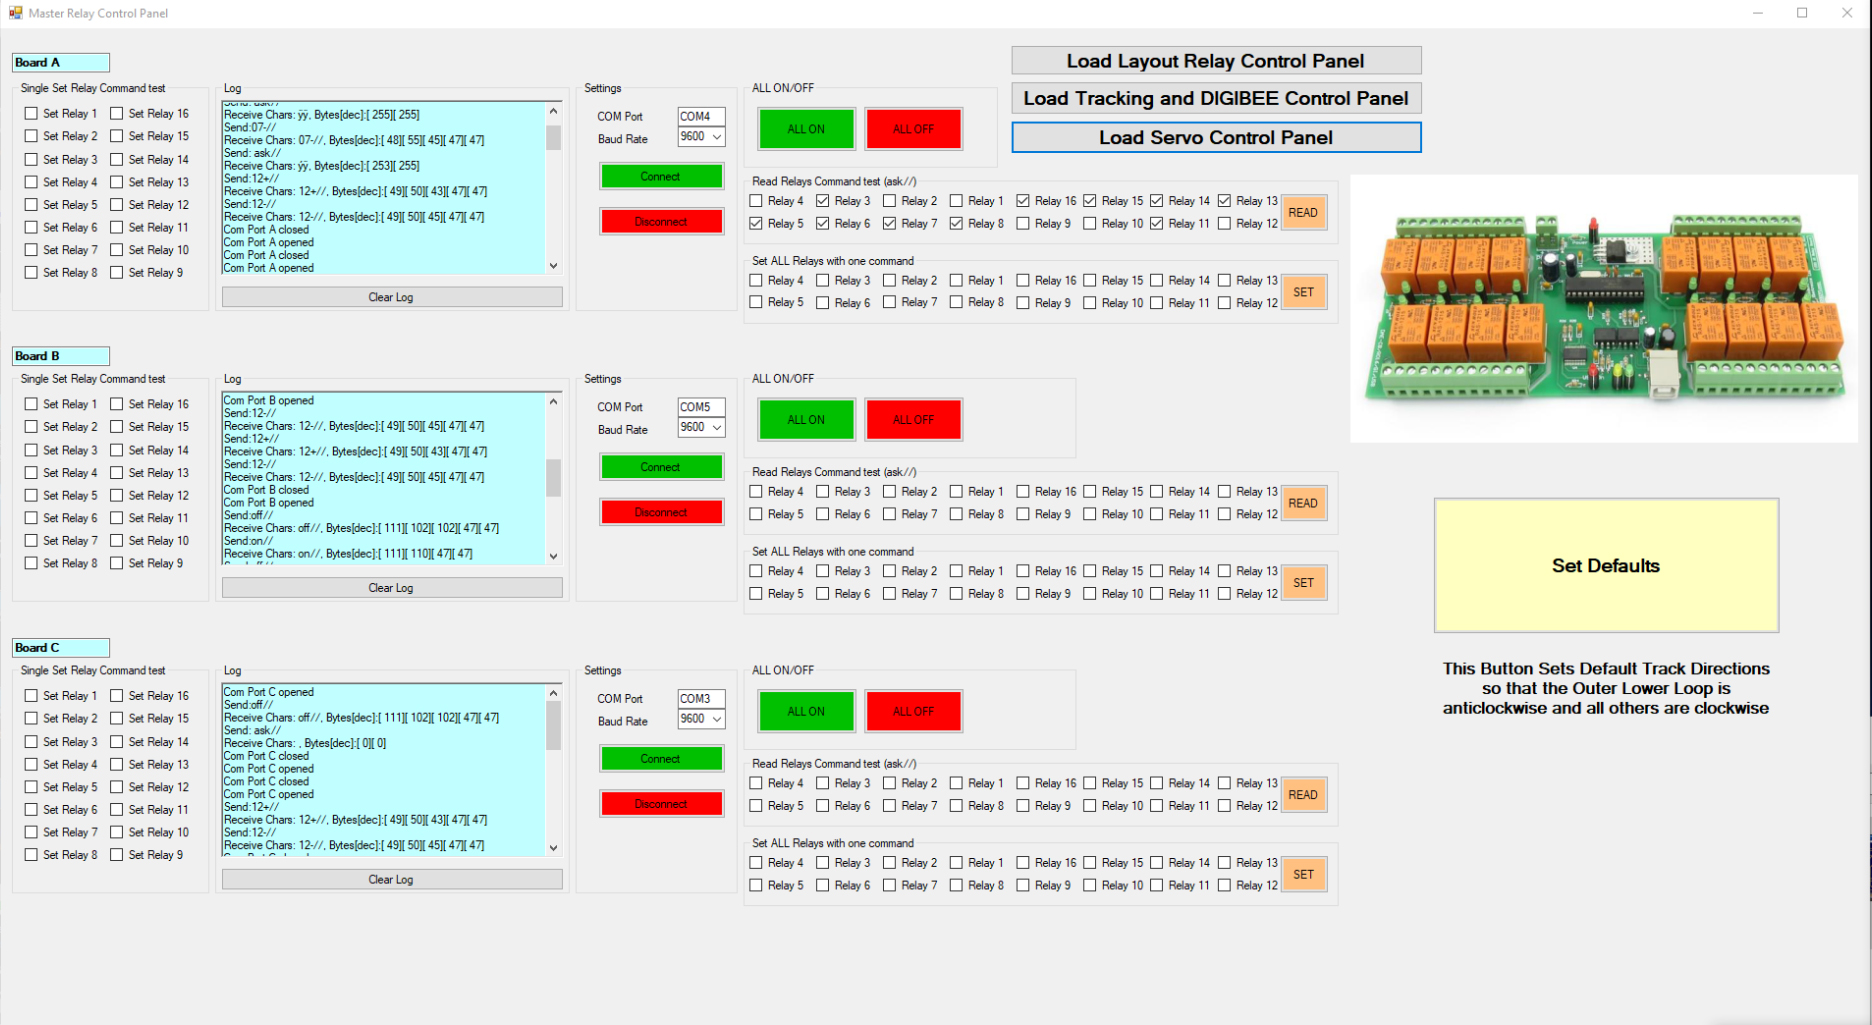
It may be necessary to use device manager to check which port numbers have been allocated for the Denkovi Relay Boards – this is a thing that can vary depending on connected hardware but the initial screen of the control package allows user modification of the port number if there is a problem
Startup Procedure
The following list shows the best order for startup :-
• Ensure all items are powered up but no software running - The Hornby Elite Controller must be powered up and connected before any software is started
• VNC from HP2 to the Railmaster computer and startup Railmaster
• Start our Railway Control Program on HP2 – at this point you must ensure that the three COM ports are correctly allocated using the notes below
• Connect to the three relay boards ensuring COMs OK as below
• Use Default Set Button to initialise our standard layout
• Set Loco Speeds and Direction (all forwards initially) in Railmaster (via VNC)
• Use Either Auto or Manual Control Modules to progress – ensure track directions are correct
Note – to ensure the three COM ports are correctly allocated :-
1. Check there are 3 in device manager
2. Check there are no error messages when the software is started
3. Board 1 – Relay 12 should control front platform lights - Currently COM4
4. Board 2 – all on/off should control front loop signals - Currently COM5
5. Board 3 – all on/off should control signals on right hand branch line at front - Currently COM3
The 5 Control Screens